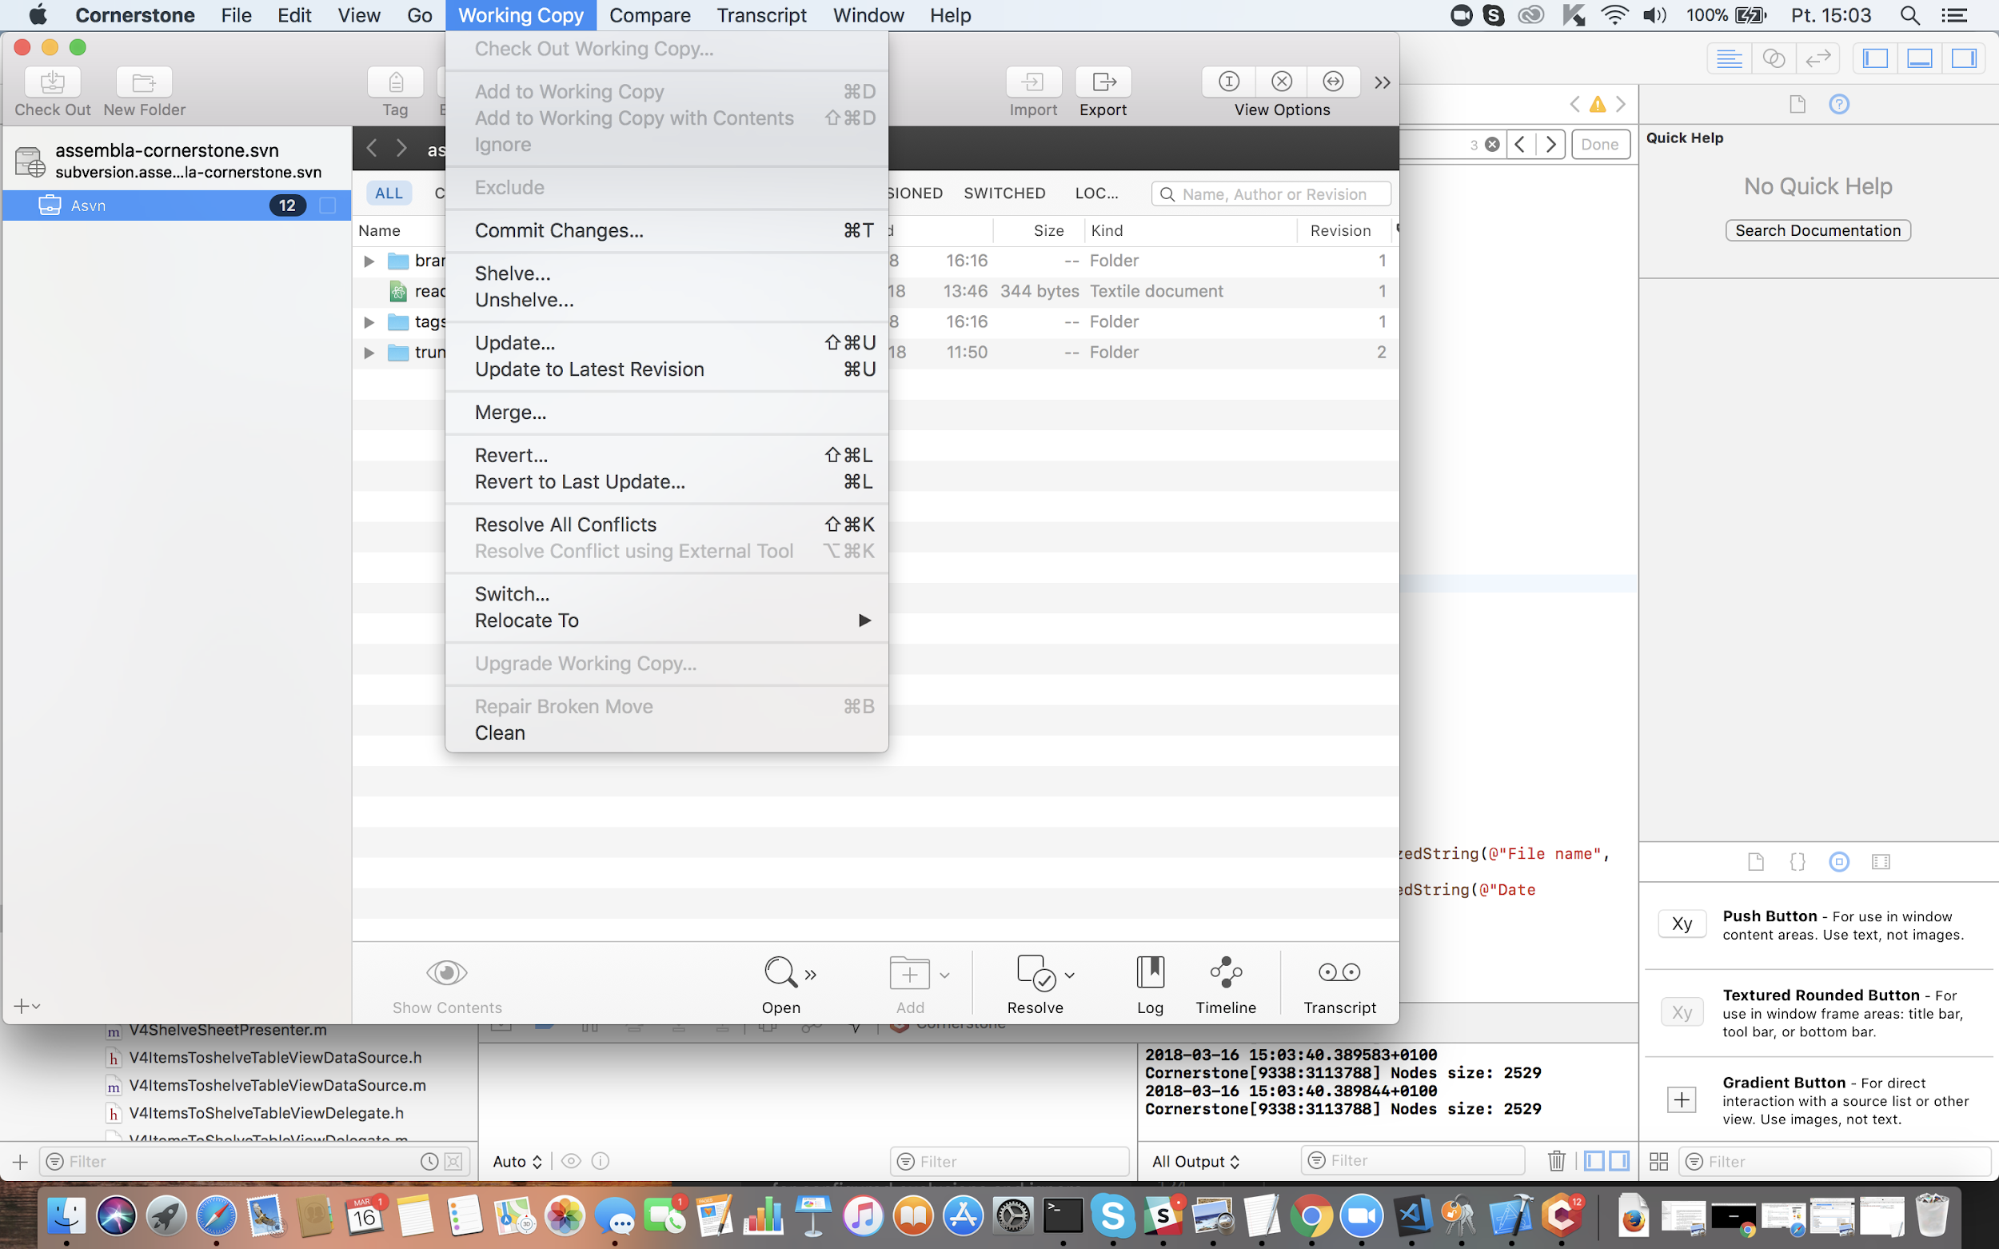
Figure 1: Working copy menu with Shelve and Unshelve
Shelving and Checkpointing are new features introduced in Cornerstone 4.0. They let you save the effects of your work to a temporary storage and continue working on your working copy. Later, you can use that saved work by patching your working copy with the contents of your shelf or checkpoint.
Shelving and Checkpointing are similar features. The difference between them is what your working copy will look like after you make a shelf or a checkpoint. A checkpoint will save your modified working copy files into a shelf, but your changes will remain in the working copy. Shelving, on the other hand, will revert your changes, so your working copy will be missing all modified files (they will be saved in a checkpoint though).
In order to be able to use Shelving and Checkpointing, you need to have a working copy checked out in Cornerstone. You can access the new features either using the Working Copy menu (Fig.1) or a right button menu on a working copy (Fig.2).
Figure 1: Working copy menu with Shelve and Unshelve
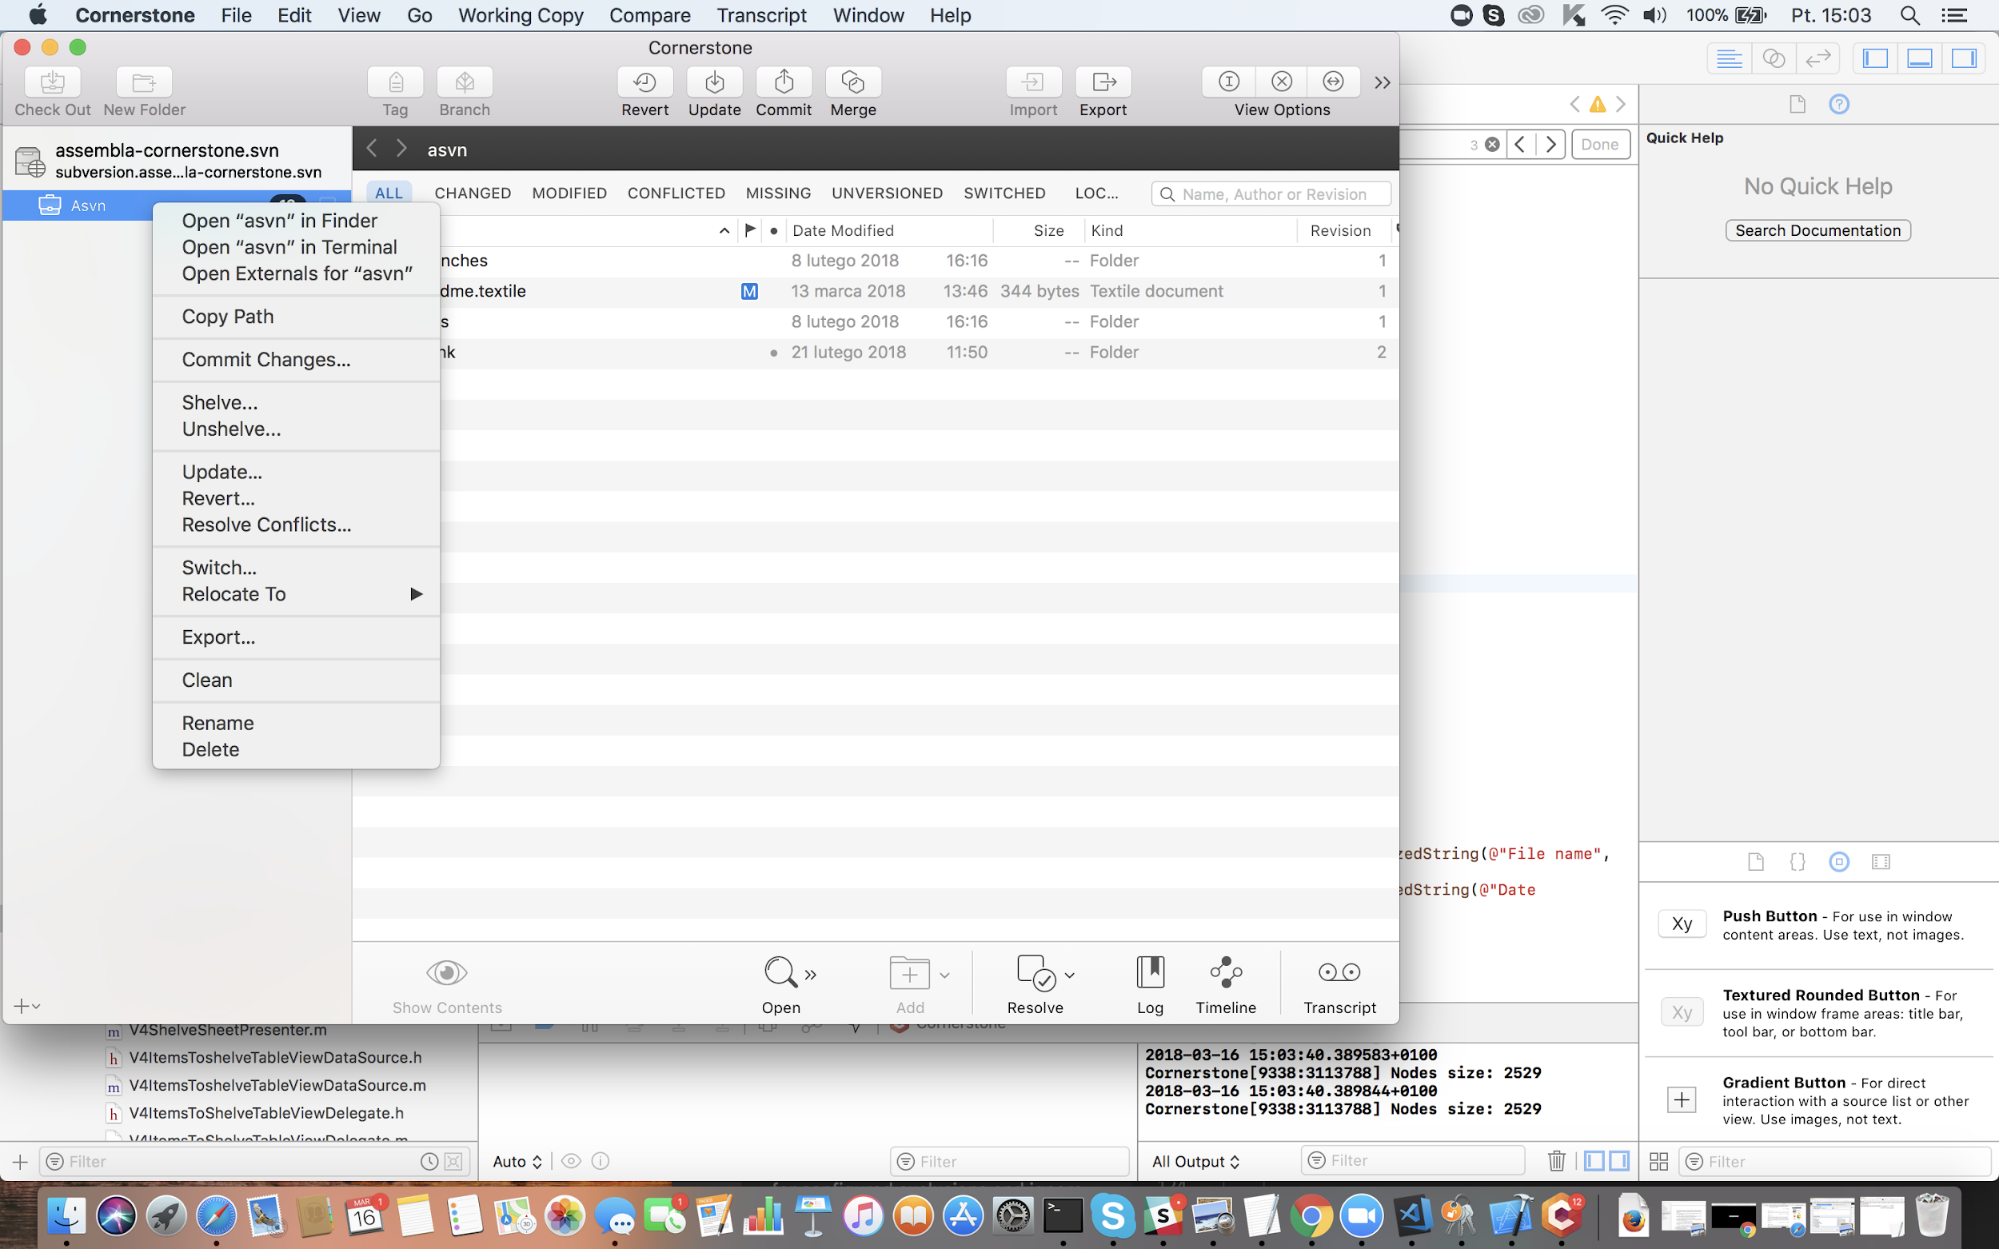
Figure 2: Left menu of Working copy – Shelve and Unshelve visible
Shelving and unshelving options can be used only on your local working copy, not on a remote repository. There is also a possibility to shelve a single file or a group of files. It is illustrated in a Figure 2.a.
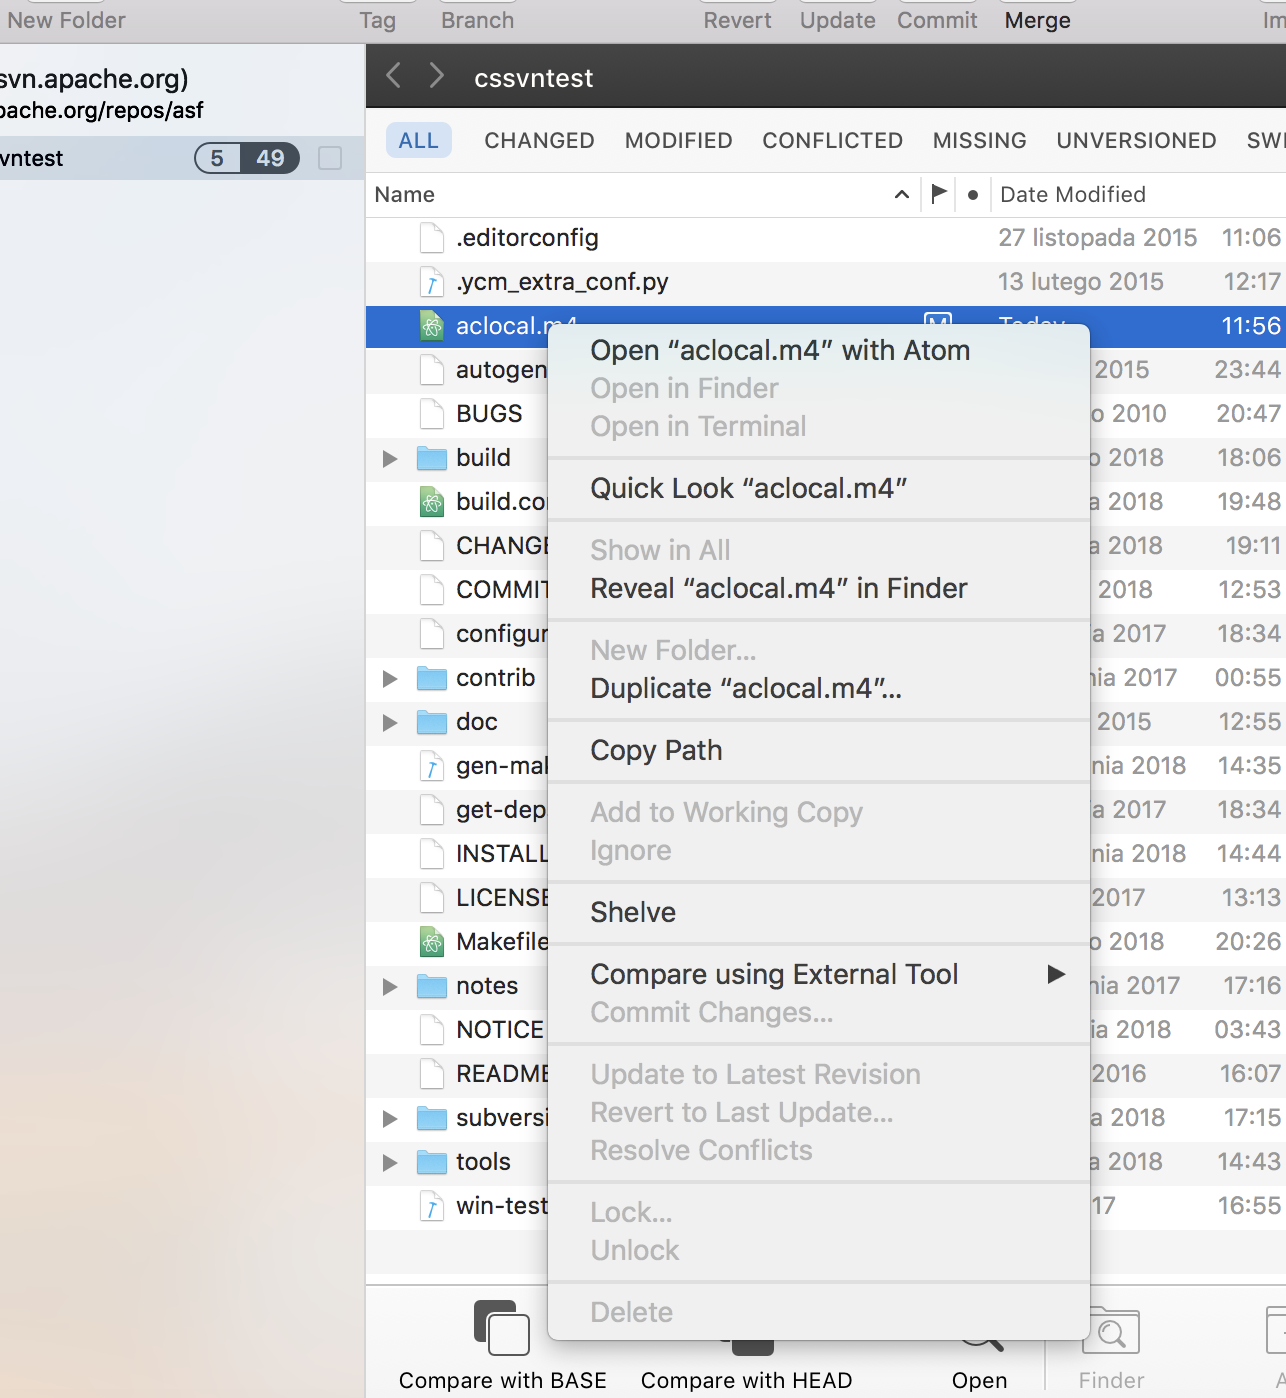
Figure 2.a: Ability to shelve a file directly from a Working Copy Browser
If you select a file or files that are modified, added, or deleted, you can shelve them directly. They will appear as selected in Shelving window (Figures 2.b and 3). You cannot, however, select a directory or non-text file to shelve. So, the Shelve changes option will be grayed out on images or directories.
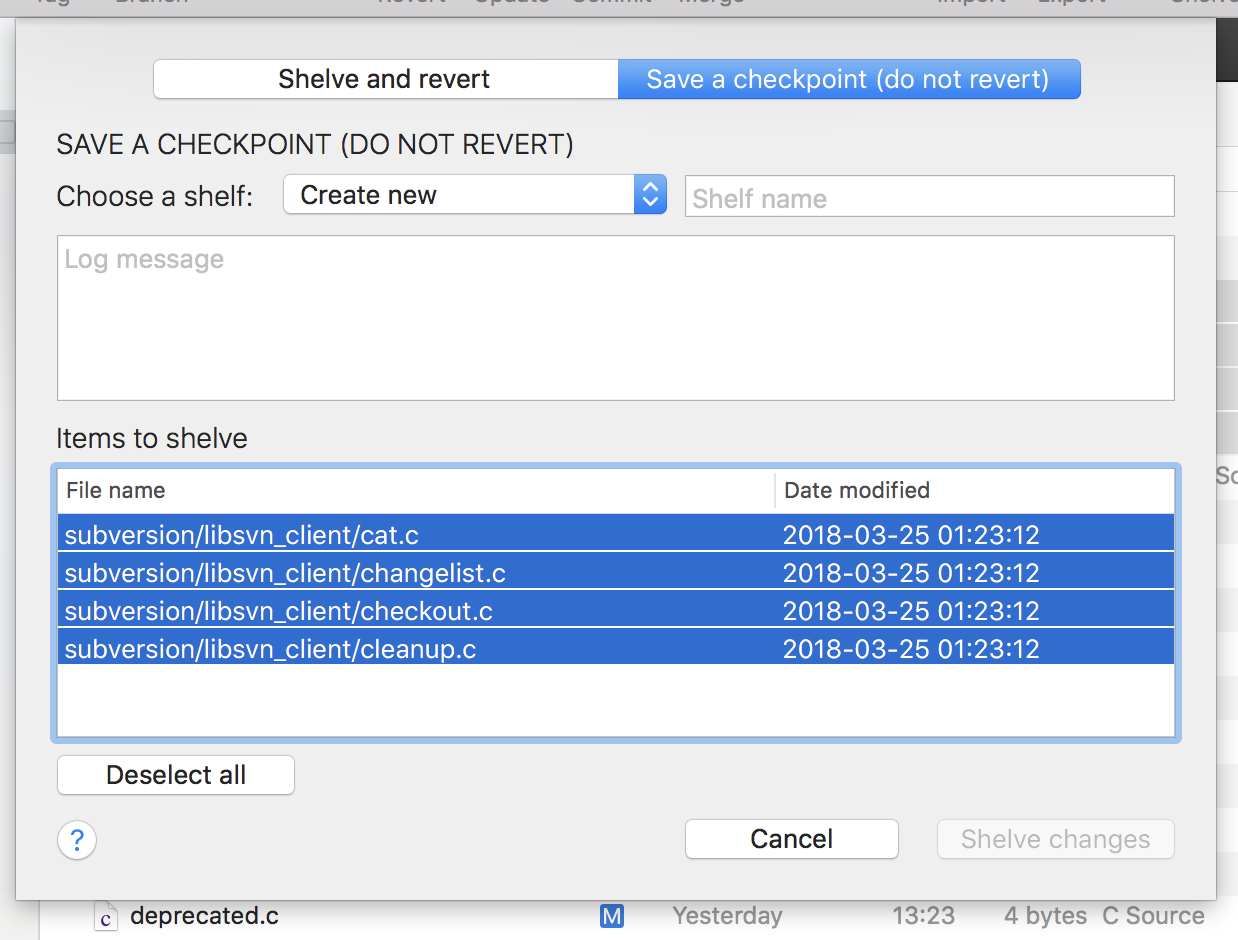
Figure 2.b: Items selected after a direct selection shelve
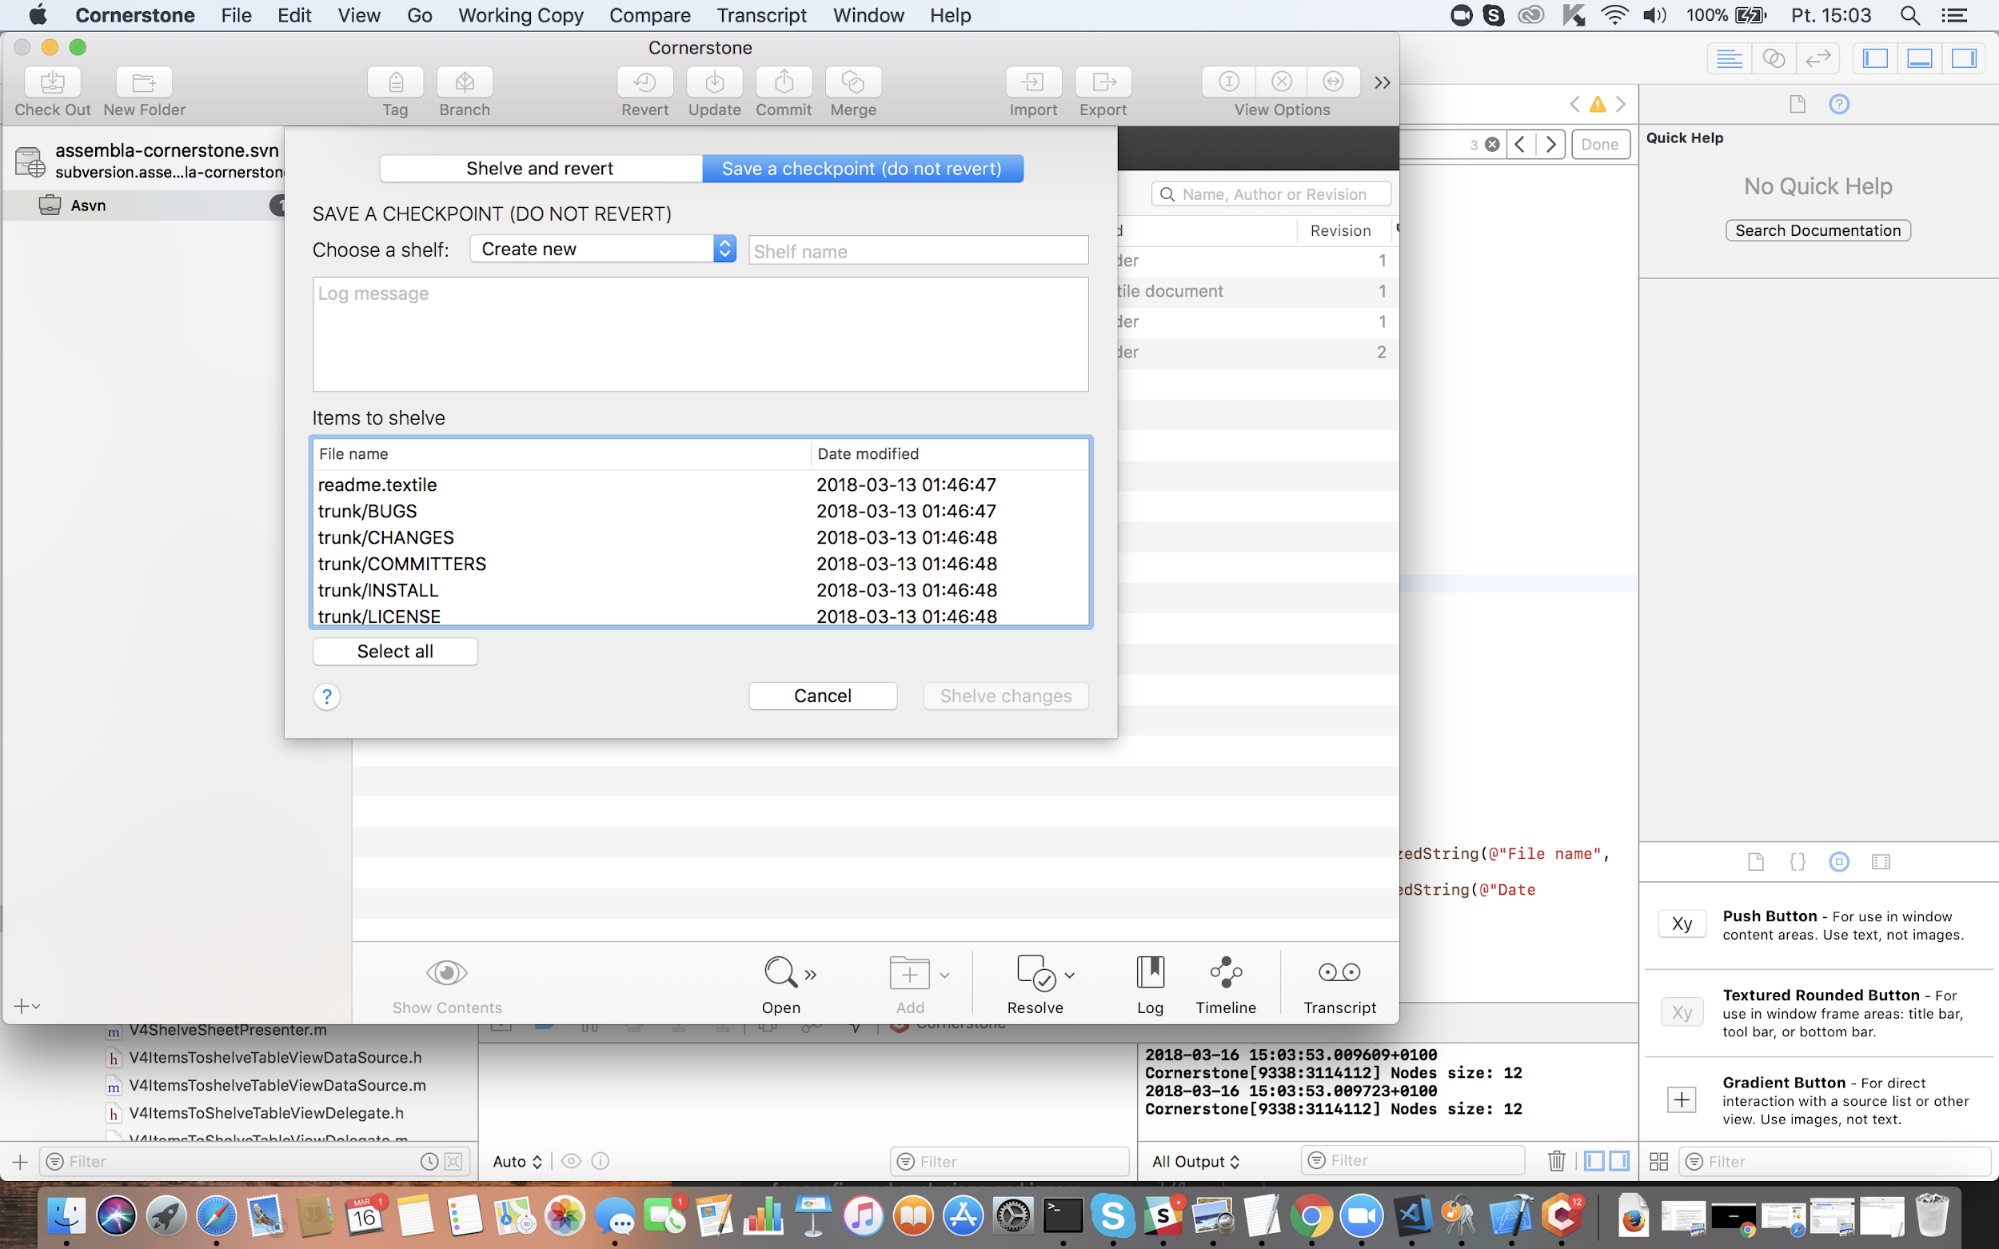
Figure 3: Shelve items
Figure 3 shows a window that is visible after the Shelve… command is clicked. In the top of a window we have a tab bar that lets us choose if we want to make a Shelf (Shelve and revert option), or a Checkpoint (Save a checkpoint (do not revert) ).
Below that we have an option to choose a shelf. We can either create a new one (default option) and enter a new name for it or choose an existing one. If you choose the existing shelf, SVN will add a new version to it, which will be visible in the Unshelve dialog, described later.
In this window we can optionally type a log message for a shelf. The log message is the same for every version within a shelf – it’s one log message for one shelf. However, it’s an optional selection and a shelf does not require a log message.
Finally, in the bottom of the window we are presented with a list of files that have been changed (in SVN terminology). We can select which files will be added to our newly created shelf/checkpoint. We do it by clicking them in the list. We can also use a button to select all.
After we complete all of the steps, the Shelve changes button will become active. When we press it, the shelf/checkpoint will be created.
Figure 4 presents the Unshelve window. It allows you to unshelve changes that were saved in a Shelve window. If you do not have any shelves or checkpoints, the options will be empty and you won’t be able to do anything here.
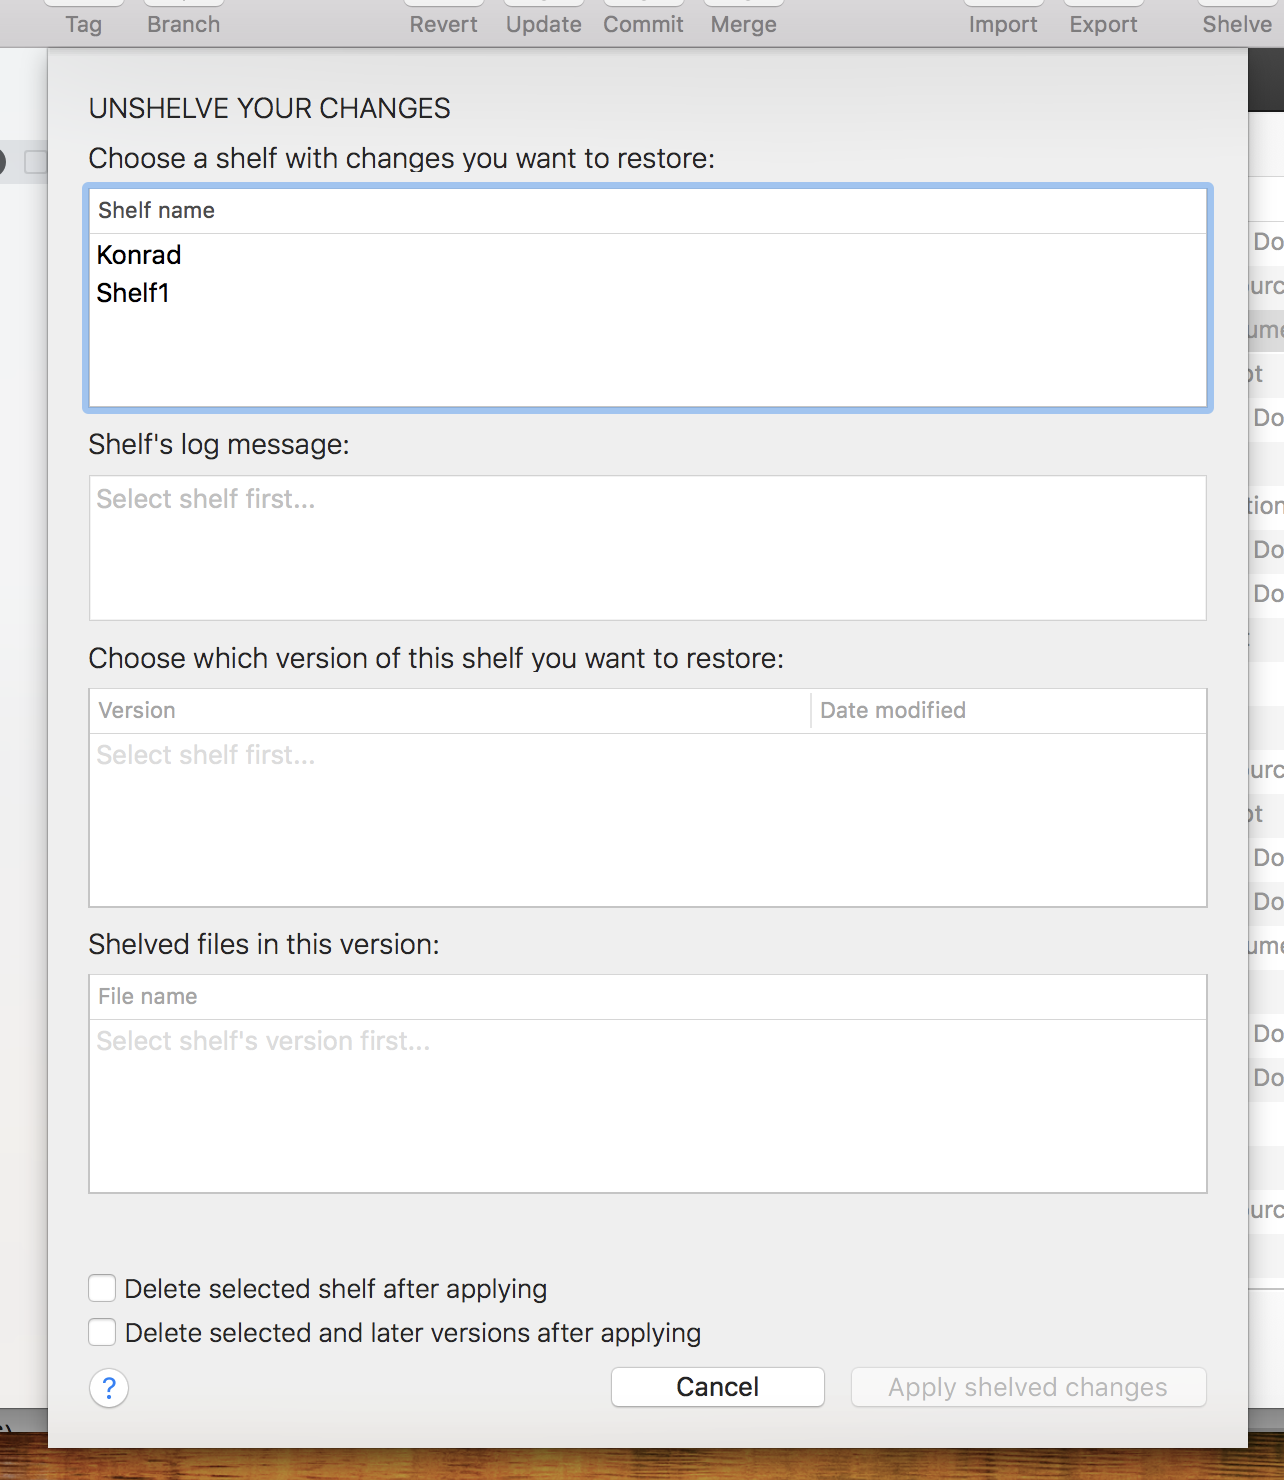
Figure 4: Unshelve window
If you have shelves or checkpoints, they will be visible in the first list. You can choose which one is to be unshelved. If you select a shelf, you will see all versions that were created for a selected shelf.
Note: the shelf can be empty, it doesn’t have to contain any versions. It can also create quite a few versions, depending on how you were using the shelving mechanism. Each version has a date modified field, which tells you when the changes were made.
The next step is to select a version that is to be unshelved. When you do that, you will see files that are stored within this version. This is a read-only field; you can only see a file’s name, nothing more.
Finally, there are 2 checkboxes. One allows you to delete the entire shelf when these changes are applied, and the second lets you delete the version that was applied and all newer versions, leaving the rest of the shelf untouched. It means that if you have versions 1,2,3,4,5 of your shelf and you are applying version number 3 and checkbox Delete selected and later versions after applying is checked, versions 3,4,5 will be deleted. You do not have to use any of these checkboxes, however you can only select one of them at the most (the other one will automatically get disabled).
There are, however, some special cases when Unshelving might not be possible. That is illustrated in the Figure 5.
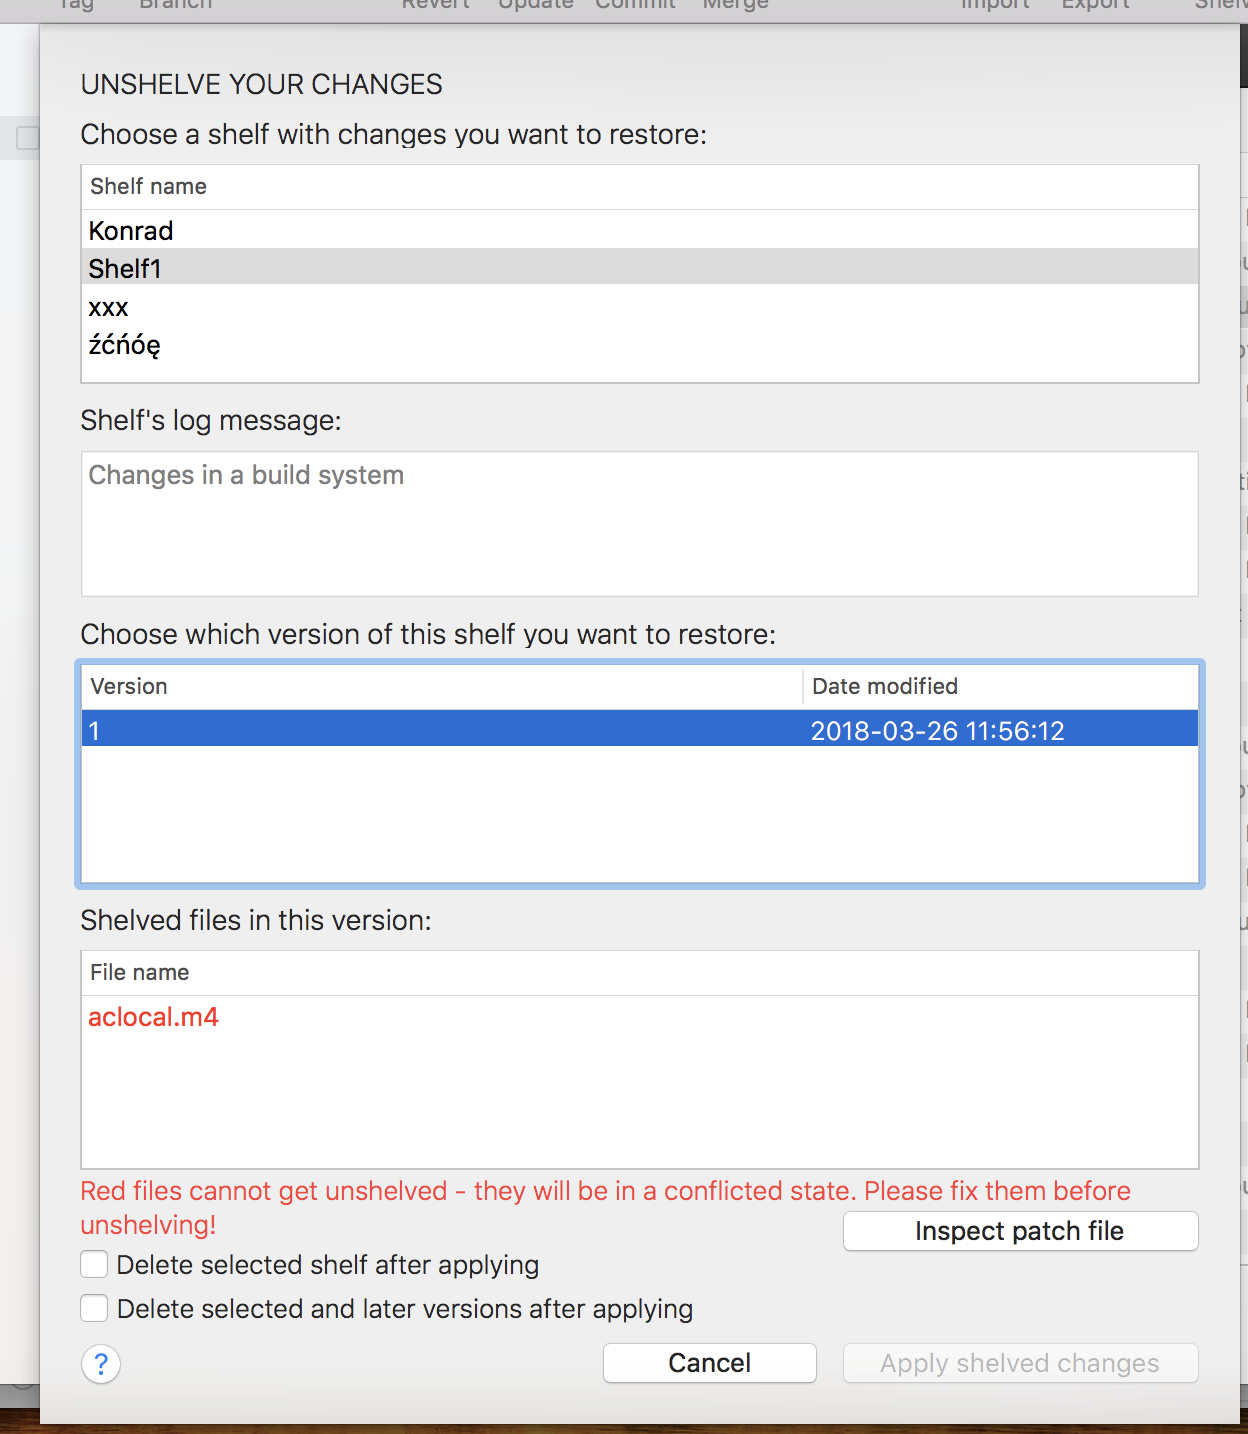
Fig. 5: Unshelve window
Sometimes, the shelf that you’ve created might cause some troubles – it might not be possible to unshelve it without generating a conflict in a working copy. Currently, shelving in SVN 1.10 doesn’t support full merge, as SVN does. It cannot generate conflicted files. That kind of situation will be detected by the application. The files that will cause a conflict are marked with a red color. A message below the table appears. You can see the patch file (for the whole shelf) and correct things. When you click cancel and Unshelve again, if you properly handled the problems, you will be able to unshelve this time.
When all the steps are completed, the Apply shelved changes button is made visible. Pressing it will apply the shelved changes onto your working copy. You will see new files in Cornerstone view for a working copy.
This feature allows users to set an environment variable when using SSH Tunnels (which should then be passed to the server as a SendEnv option)
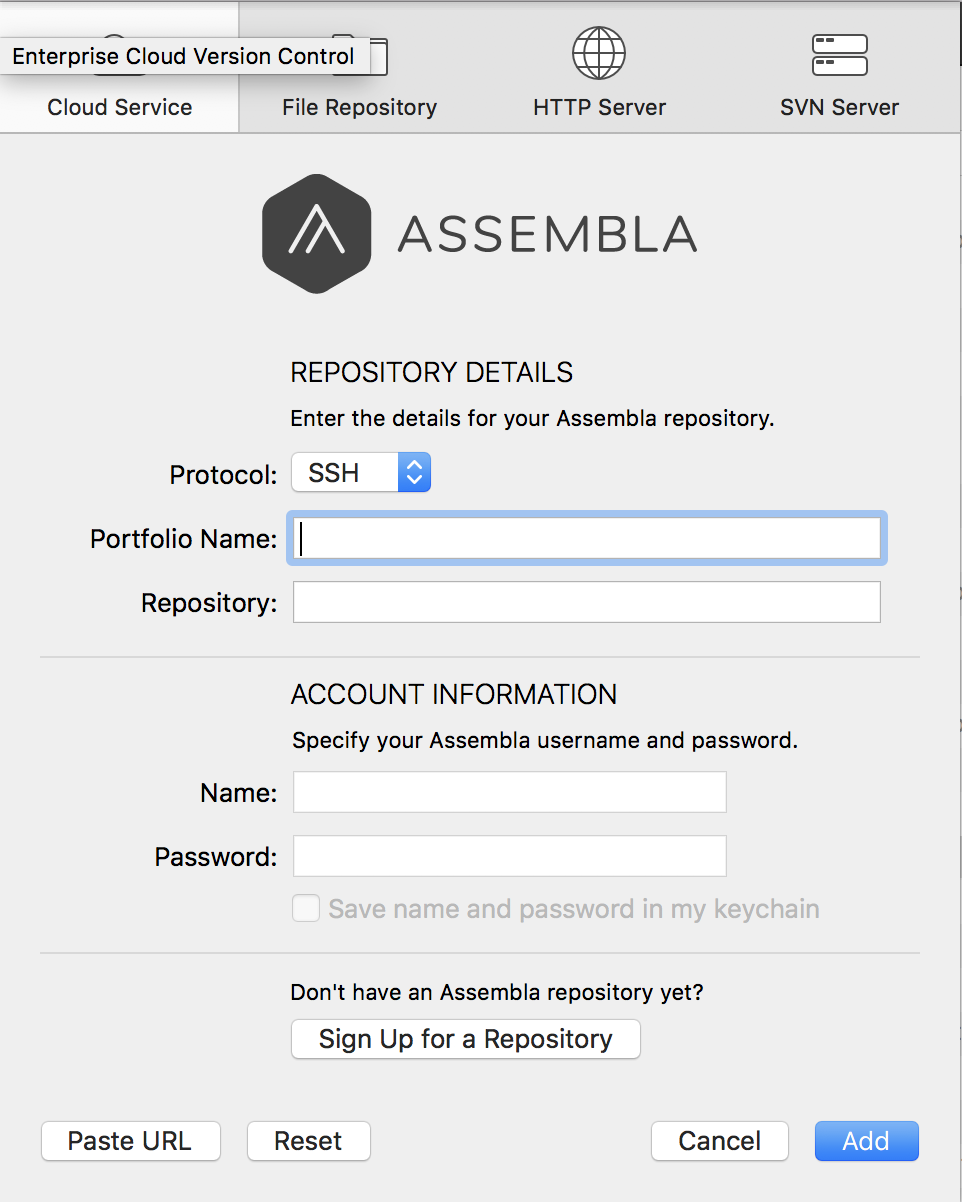
When using the SVN Server tab, a new SendEnv field allows the user to set any environment variable they like (in the form <variable>=<value>). In this case, the value does not necessarily have to be REPO_NAME, and provides the user the flexibility to connect to repositories that support other variables.
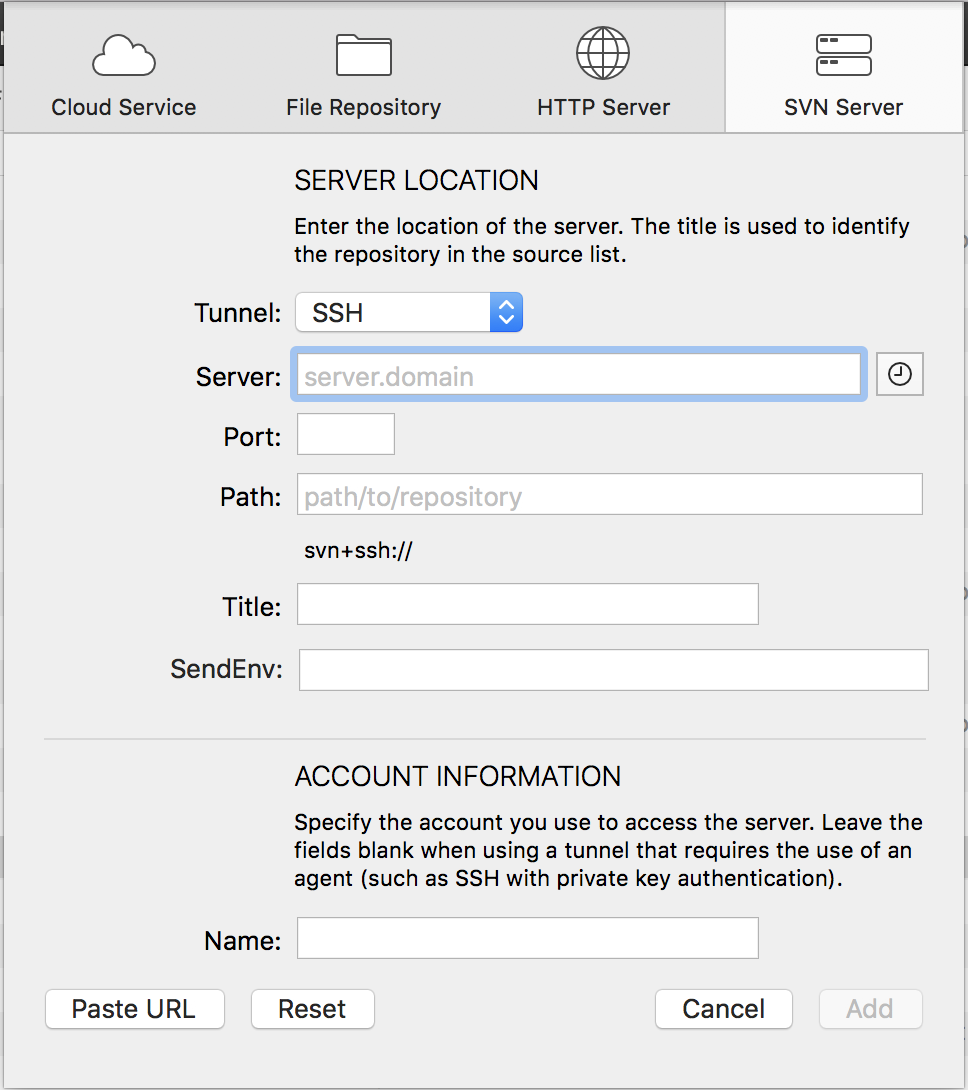
Remember that to use SSH with Assembla, you must generate an SSh key and update your SSH config. Check out our existing documentation to see how. This implements the “export REPO_NAME=demo_test” portion of that documentation.
When using the Assembla Cloud Service tab, Cornerstone uses the values the user enters in the portfolio and repository fields and sets REPO_NAME=<portfolio>^<repository>.
Most of Cornersone’s browser-based functions are selection-dependent. For example, by default the Working Copy > Commit Changes… function will only commit changes made to the selected items.
In order to select all the items in the working copy for commit, activate and select the working copy in the source list.
While the selection-dependent nature of the browser functions affords the user a great deal of control, it requires that the user consider which of the app’s views is currently active, shifting the focus from the browser to the source list and back again as required.
Depending on your workflow, this may not always be appropriate.
For this reason, Cornerstone provides selection-independent alternates for most of the browser functions.
These selection-independent functions perform the same function as their standard counterparts but the scope of the functon is always the entire working copy or repository.
For example, Working Copy > Commit Changes… (key equivalent ⌘T) has the selection-independent alternate Working Copy > Commit All Changes… (⌥⌘T).
See Alternate Menu Functions for a list of the available alternate functions.